Tuesday, August 28, 2012

Sushi

    I have noticed alot of people in the last few years who are crazy about sushi. I am not as exctied about it but I try to taste the different kinds and have begun to like sushi that incorporates shrimp. I found a little guide to help you make sushi at home!

Sushi making step 1


The first thing you need is a roll matt.

If you cover it in cling film before use it will last much longer.

Place a sheet of nori on the matt with the shiny side facing down and the lines in the nori running vertical.


Sushi making step 2


Wet your hands with a little water mixed with vinegar, then pick up around 200g of cooked sushi rice.


Sushi making step 3


Evenly spread the rice over the nori sheet ensuring that you do not compact it too much.

Wet your hands with a little more water if necessary.
 

Sushi making step 4


Spread the rice right out to the edges of the nori and leave a 2 cm gap at the top of the seaweed without any rice on it.
 

Sushi making step 5


Make a horizontal groove in the rice running down the centre and then place the fillings of your choice on it. We recommend: cucumber, Japanese omelette, BBQ eel, tuna mayo ir avocado.
 

Sushi making step 6

 
Carefully begin rolling the matt from the edge nearest you by placing your thumbs under it and your fingers on the filling. Press down a little as you roll, but not so tightly that the rice and filling comes out the sides.


Sushi making step 7


When the top of the roll matt reaches the edge of the rice, pull out the end of the matt so that it is not rolled up in the sushi.

Sushi making step 8


Holding the matt away from the sushi, flip the roll over one more time so the the seaweed is totally wrapped around the rice.


Sushi making step 9

 
Gently press the sides of the roll with fingers to flatten, and carefully remove the matt from around the sushi.

Sushi making step 10


Cut the roll in half using a sharp knife that has been dipped in a mix of vinegar and water. Then place the two halves next to each other and cut into thirds.

Sushi making step 11

 
Your sushi is ready. Enjoy with some wasabi paste and soya sauce.
 
There you are sushi lovers! If you liked this how to check out The Good Food Channel at http://uktv.co.uk/goodfood/homepage/sid/566
 
Ani <3

Tuesday, August 21, 2012

Running late? Time save tips.

  I hate when I am going to work, classes, or even an event that requires me to be there on time but I am running late. What do you do when you are running late? I decided to find some of the best tips that will get you ready fast but still seem like you took time on yourself.

Don't be this girl! You will ruin your shoes!

    Lets talk hair. How many mornings do you start off your day with amazing perfect hair? Not many?
Know your simple updos. A really cute updo that looks great on anyone is the top knot. They usually only take a few minuets to throw up too. For days you are running late I suggest that you go for a messy casual bun so later if a few pieces fall out it is only adding to your look.

So messy but so pretty.

   Another good go to style is a simple pony.  These can be great time savers but have variations on how to wear them.They look great high or low. Messy ponys look great for casual days and smooth ponys for more serious days. A little volume to any up do at the crown or bang never hurts!

High on the head and high on volume.

   Want to add a little extra something to your hair when its up? Take a small section of hair from the bottom and wrap it around the elastic, pin it back underneath and done. I get complements every time I do this.

Low pony with a simple wrap.

    Don't know how to do these styles? Check on youtube.com for tons of videos on how to do these and many other styles.


 Next lets talk makeup. When you are running late you might not have time to do your full makeup routine. When you cant know which products you use make you feel the best and limit your self to 2-3 of those. A look I really usually fall back on when I am in a hurry is a simple eye and light lip. Just coat with a few sweeps of mascara or eyeliner and bit of lipstick. Its quick and everyone has pretty lips so pull attention to them!
If you aren't used to lipstick start with more neutral colors so that you feel confident. Confidence is what makes you stand out. Also make sure to start with lip balm! 

Simple eyes light pink lip.

    Another good thing to try is a powder or cream blush. Pop it onto the apples of the cheeks for a clean look.

Clean and simple blush.

   Last we need to talk about clothes. Usually when I am running late its because I am lazy and had a hard time getting out of bed in the morning. Days like these I suggest wearing something comfortable and simple. Nothing worse than being tired and messing with your outfit.Know where those outfits and pieces are that make you feel the most comfortable.

Fashionable and comfy.


Simple every day of the week pieces.


    This is my biggest piece of advice. Choose your outfits a week ahead of time! Do it every weekend. It may sound time consuming but compare that to all of the time you will waste trying things on in the morning. I have been doing this a long time. I already know what I am gonna wear and I know it is something I am gonna feel good in. I also don't have to get up that much earlier to try and plan an outfit. That has saved me so much time when I am running late because I just throw on what I planned and out the door I go. After a while you kinda look forward to planning your outfits and its not a hassle. If you really feel like this wont be for you then just lay them out every night before you go to  sleep. Think about it, could you use the extra 15minuets of sleep in the morning?!


Simple class outfits.

Work Casual

     Some week planners such as myself take it to the next level and have photos of all their clothing and make a photo planner. Personally, that would be too much for me so I lay them out in a closet organizer.
Hopefully these tips will help you get ready when you are pinched for time.
Ani<3

Monday, August 13, 2012

Animals

Have you had a bad day? Take some time to enjoy these wonderful photos of animals to make everything better.

Mr. Monkey
Donkey

Piggies
Bunny
Cotton Ball

Elephant

Horse

Lazy Dog

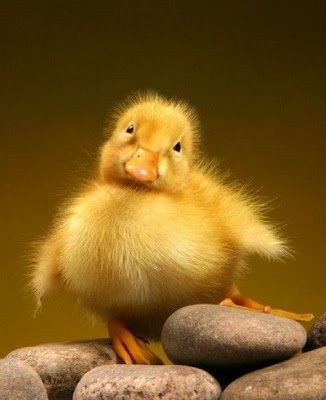
Duck
SWING!

OWL


Happy dog

Penguin

Chameleon
Me


Want more cuties?! http://www.cutestpaw.com/ has tons of heart melting photos.
ANI

Wednesday, August 8, 2012

Seasons

    My sister is getting married soon and she has been talking about her plans for everything. We have been looking at wedding dresses, cakes, even thinking about a DJ. Something that has been a difficult decision has been what she has wanted to theme her wedding, if at all. She has picked a fall theme which I love! The colors for this theme would be rich browns and deep oranges. Although she has decided to use a more natural makeup, so that she doesn't hide her beautiful face, I still had been thinking about fall themed makeup and now every other season. I am now on a hunt for all the season related makeup looks that I cant get my hands on!

    Speaking of her awesome Fall theme lets begin with that makeup look. During fall there are leaves on the ground, the air is getting nippy, and the apple cinnamon candles start to come out. I think of deep warm colors when I think of Fall time.

http://www.walltor.com/wallpaper/fall-colors--magic-of-the-naturefall-colors--amazing-autumn-scene-wallpapers-54772

    I felt this photo was an amazing inspirational photo to find looks that matched the season. I love that this photo is not only a great piece of simple photography but also has reds, yellow, orange, brown, and even a hint of deep green.  The fall look I chose is actually very simple but edgy! Her lips a really pretty with a deep fall color red and her hair brings in the rich browns I talk about before. I also love the in this look she has a simple eye and let her lips stand out!

http://pixelpastahome.blogspot.com/2011/03/youngbloog-photoshoot.html

   After fall has gone and winter makes its way and everything gets cold.  My inspiration is this amazing photo because the colors are a little more frosty whites and light blues. In this photo the trains are dark green which isn't usually a winter color but I think it could work in a winter look.

http://www.tucson2010.com/2011/10/29/taking-pictures-in-winter/


   The winter look I chose isn't your usual find. It does have glitter inspired by ice twinkling but doesn't not have an ice blue like most winter looks. I chose this look because my inspiration photo has a green in it and I wanted to find a winter look that had a green as well.


http://www.centrefashion.com/choosing-the-right-eye-makeup-colors.html/eye-makeup-colors3

   My favorite time of the year is spring! I love all of the flowers coming back to life and all of the pastel colors!


http://weheartit.com/entry/3563424

   I chose this look because it was so soft and stayed true to not only the pastels of spring but also the flowers! I love the messy braid....it makes me think she is a fairy princess!


http://www.beautylish.com/clairemakeupstudio


   AW! Last we get to look forward to simple summer. I think of a multicolor look just like spring but I imagine them to be much more bright and contrasty like a summer sunset.


http://beforetimerunsout.tumblr.com/post/3192377684

   Last but not least my summer time look! I know that this look is very colorful and not everyone can pull it off but why not give it a try and find out for sure.


http://www.makeup4all.com/tag/makeup-look/


    Most of all even though you use a specific season as your theme I don't think that should rule what season you wear the look. For example, fall colors look amazing year round. now get out there and find your own winning looks.


ANI<3

Saturday, August 4, 2012

Strawberry Short-cupcakes!

  I found a recipe on visualrecipes.com that I am excited about. I think I will probably visit a ton because they don't just give the steps but also show you the steps! I found these little cupcake size shortcakes look so so so good! The fresh fruit and cream.... I cant wait to try them!


Ingredients

  • 1 3/4 cups sugar
  • 2 1/4 teaspoons baking powder
  • 1 teaspoon pure vanilla extract
  • 2 1/2 cups cake flour
  • 2 tablespoons unsalted butter
  • 1/2 teaspoon fine sea salt
  • 4 large eggs
  • 3/4 cup vegetable oil
  • 1 cup whole milk


Step one

Preheat your oven to 350 degrees Fahrenheit with the baking rack in the center.
In your stand mixer's bowl (or just a large bowl if you don't have a stand mixer), add in the sugar, flour, vegetable oil, baking powder, salt and vanilla extract. With the paddle attachement, mix everything together at low speed. Once the ingredients have come together, you can raise the speed to a medium-low speed, around number 3. Continue mixing for about a minute.


Step 2

After a minute of mixing has passed, start adding in the eggs with the mixer still on, one by one, allowing each egg to fully incorporate before adding in the next one. After the 2nd egg, you may need to shut the mixer off and use a spatula to push down the batter. Do this as many times as you need to.


 Step 3

Here is a photo of the last egg as it is being mixed. You can see that the batter is getting runny. Once the final egg has been added, keep the mixer going at medium-low speed for another minute.  


 Step 4

Next, drop the mixer speed down to its slowest setting and slowly add in the whole milk to prevent splashing.Once all the milk has been poured in, increase the speed to medium-low and mix for 1 minute.


 Step 5

Place cupcake cups / liners into a cupcake baking pan. Pour the vanilla cupcake batter into each of the cupcake liners, leaving 1/4" of the liner still showing.


Step 6 (the fun part)

Bake at 350 degrees Fahrenheit for 25 to 30 minutes. Since oven temperatures differ, use a tooth pick to test when they are done. To do this, poke a toothpick in the center of a few cupcakes. If the toothpick comes out without any batter stuck to it, they are done. Remove them from the oven and allow them to rest for about 30 minutes. You can then decorate your vanilla cupcakes however you wish.

If you wish to make strawberry shortcake cupcakes, just slice a vanilla cupcake in half, and add whipped cream on the top of the bottom half. Then place sliced strawberries in the whipped cream. Then place the other half of the vanilla cupcake on top, and cover with whipped cream and a strawberry.


That is it! 


YUM!